Introduction
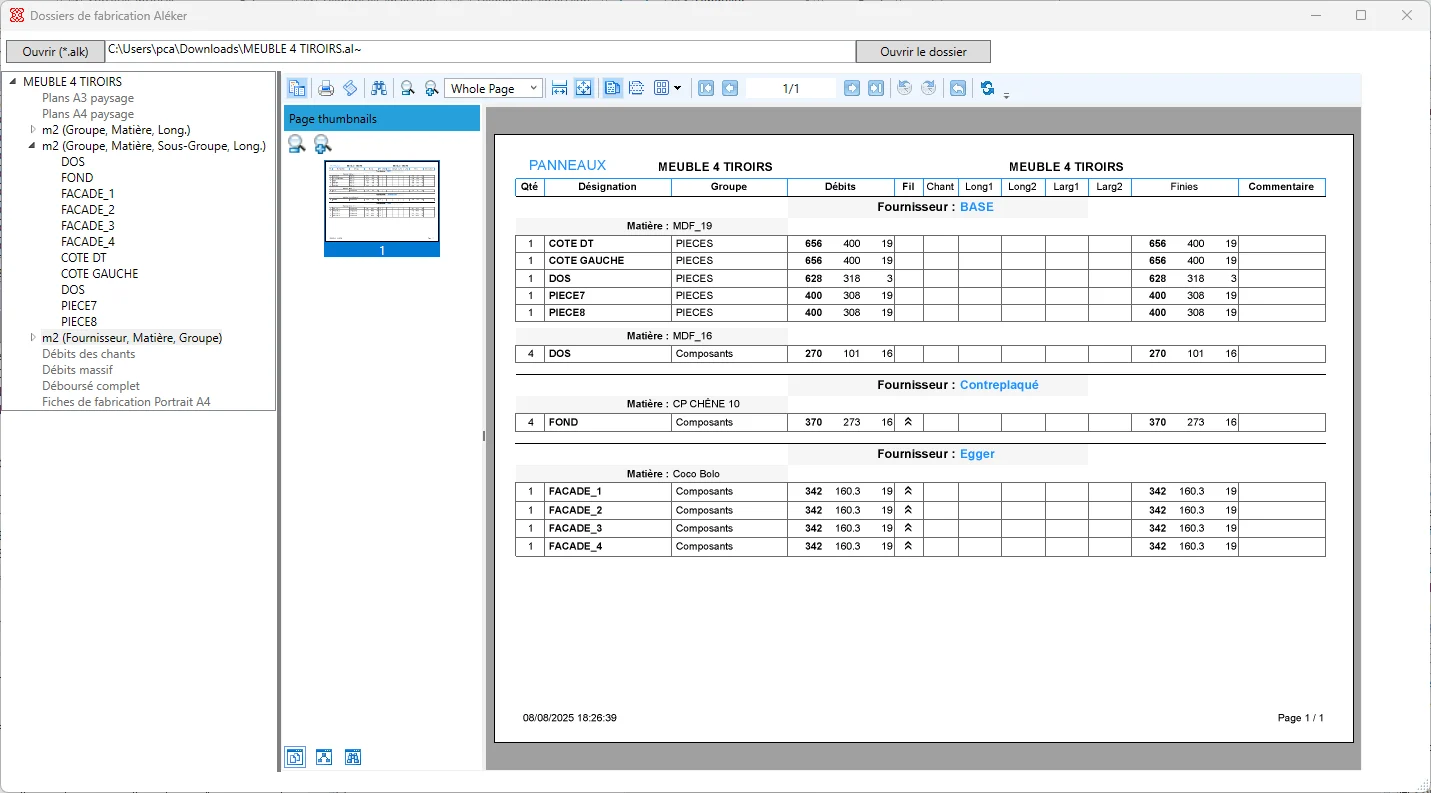
A cutting list is one of the first documents a workshop needs after design. It translates the drawing into panels, dimensions, materials and useful production information.
1. Why building a cutting list is essential
Without a reliable cutting list, the workshop has to re-read the drawing, recalculate dimensions and manually prepare orders. This creates delays and avoidable mistakes.
- → Material quantities become clearer.
- → Panel dimensions are easier to check.
- → Workshop preparation starts from structured data.
- → The customer project remains connected to production.
2. Steps to generate a first cutting list
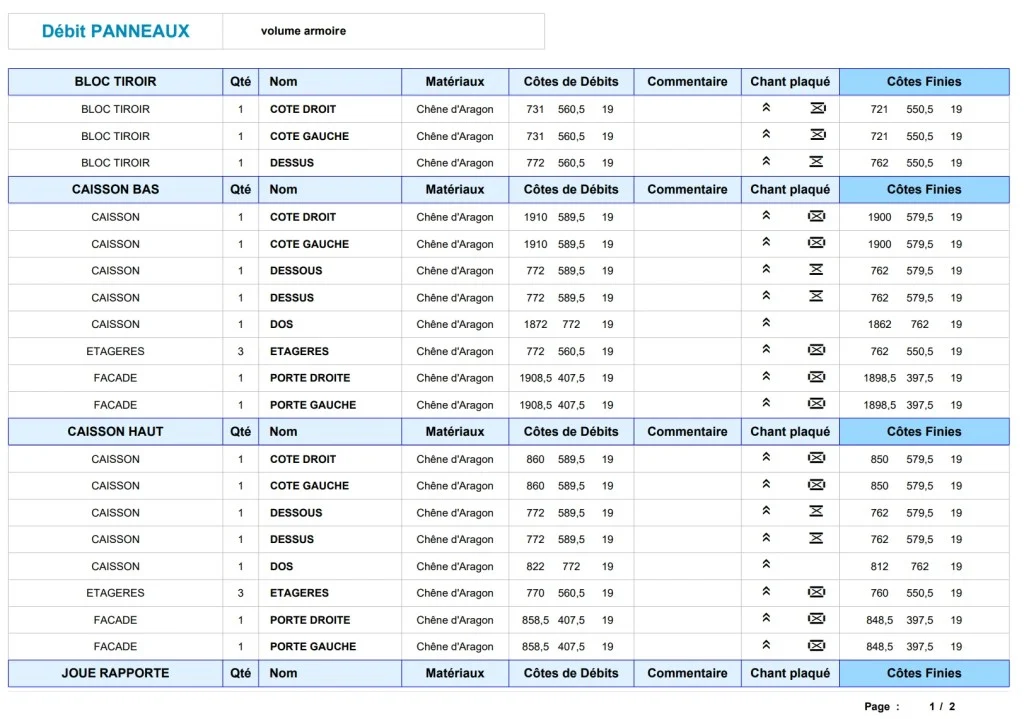
The first step is to draw a simple but correctly structured project. Parts, groups and materials must be named in a way that makes sense for production.
Step 1: draw and structure the project
Create the furniture or fitting in 3D, then organize the components so each panel can be identified.
Step 2: assign materials and useful data
Material, thickness, grain direction, edges, oversizes and comments make the list usable by the workshop.
Step 3: generate, check and export
Once the model is ready, the list can be generated, checked and exported for ordering, cutting, labels or further preparation.
3. Concrete benefits for the professional craftsperson
- → Less manual re-entry.
- → Fewer dimension errors.
- → Clearer workshop communication.
- → A more professional way to prepare production.
4. Why choose Aleker for this workflow
Aleker keeps the cutting list linked to the 3D project. When the drawing changes, the production information can follow the change instead of being rebuilt separately.
Conclusion
A first cutting list should be simple to create, but accurate enough to be useful. That is where a woodworking CAD workflow becomes valuable.